Professional mechanics charge $100-150 per hour for labor alone. However, many common repairs require only basic tools and moderate skill.
Most car owners pay thousands annually for simple repairs. Consequently, learning DIY skills transforms your automotive budget dramatically.
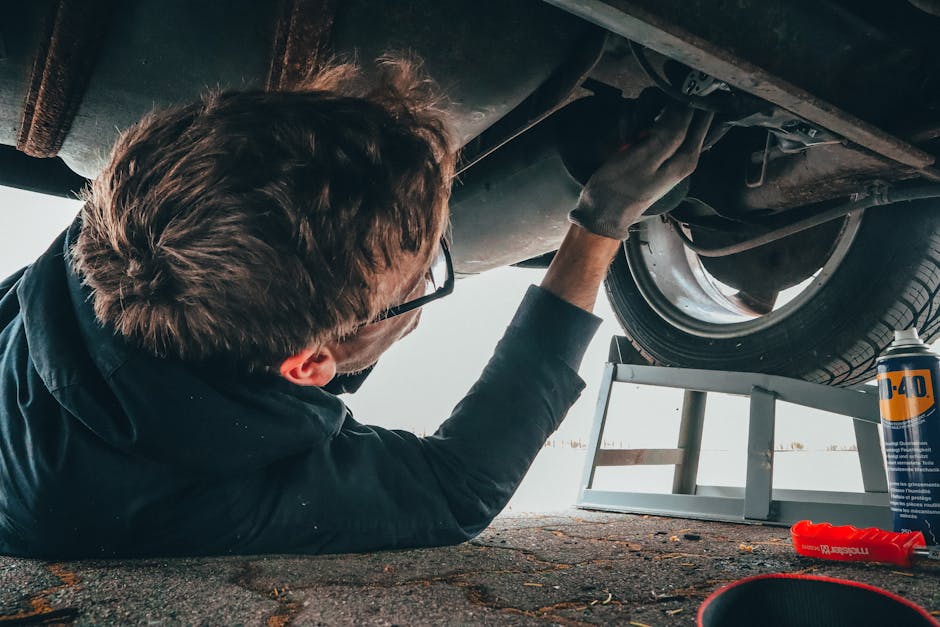
1. Replace Brake Pads and Rotors
Brake jobs cost $300-800 at shops for parts and labor. Nevertheless, DIY completion takes 2-3 hours with basic tools.
Jack up the vehicle and remove the wheel safely. Subsequently, you’ll access the brake caliper and mounting hardware.
Remove caliper bolts and hang it with wire carefully. Additionally, never let calipers dangle by brake lines.
Slide old pads out and compress the caliper piston. Furthermore, use a C-clamp or specialized piston tool.
Install new pads and reassemble in reverse order. Therefore, you’ll save $200-500 in labor charges alone.
| Repair Item | Shop Cost | DIY Cost | Time Required | Difficulty |
|---|---|---|---|---|
| Front Brake Pads | $250-400 | $50-100 | 2 hours | Moderate |
| Rear Brake Pads | $200-350 | $40-80 | 2 hours | Moderate |
| Front Rotors | $300-500 | $80-150 | 3 hours | Moderate |
| Rear Rotors | $250-450 | $70-130 | 3 hours | Moderate |
2. Change Your Serpentine Belt
Serpentine belts drive essential accessories like alternators and pumps. Moreover, failure leaves you stranded immediately without warning.
Shops charge $150-300 for this 20-minute job. Consequently, DIY replacement represents exceptional value for your time.
Locate the belt routing diagram under your hood. Subsequently, take a photo for reference before removal.
Release belt tension using the tensioner pulley. Additionally, some tensioners require special tools for safe operation.
Route the new belt exactly as diagrammed. Therefore, all accessories receive proper power from the engine.
3. Replace Your Car Battery
Battery replacement at shops costs $200-400 including markup. However, buying batteries elsewhere and installing yourself saves significantly.
Disconnect the negative terminal first to prevent sparks. Subsequently, remove the positive terminal and any hold-down brackets.
Lift out the old battery carefully as they’re heavy. Additionally, inspect the tray for corrosion requiring cleaning.
Install the new battery in reverse order. Furthermore, apply terminal protectant to prevent future corrosion.
Test all electrical systems before considering the job complete. Therefore, you’ll catch connection problems immediately.
4. Replace Spark Plugs and Ignition Coils
Worn spark plugs reduce efficiency and performance noticeably. Nevertheless, replacement remains straightforward on most vehicles.
Shops charge $200-500 for spark plug replacement. Consequently, DIY saves hundreds while improving engine performance.
Remove ignition coils or plug wires one at a time. Subsequently, this prevents mixing up the firing order.
Use a spark plug socket with rubber insert for safe removal. Additionally, check gap specifications on new plugs before installation.
Torque plugs to manufacturer specifications exactly. Otherwise, you risk stripping threads or damaging plugs permanently.
5. Change Transmission Fluid
Transmission fluid changes cost $200-400 at shops. However, this maintenance extends transmission life dramatically when done regularly.
Locate the transmission pan and drain plug underneath. Subsequently, position a large drain pan to catch old fluid.
Remove the pan bolts carefully as fluid may spill. Additionally, the pan contains magnets collecting metal debris.
Replace the filter and clean the pan thoroughly. Furthermore, install a new gasket ensuring proper sealing.
Refill with correct fluid type to proper level. Therefore, you’ll ensure smooth shifting and long transmission life.
| Fluid Service | Shop Cost | DIY Cost | Interval | Savings Per Service |
|---|---|---|---|---|
| Transmission | $200-400 | $50-100 | 50k miles | $150-300 |
| Coolant | $150-250 | $30-60 | 50k miles | $120-190 |
| Differential | $100-200 | $30-50 | 50k miles | $70-150 |
| Power Steering | $100-150 | $20-40 | 50k miles | $80-110 |
6. Replace Worn Suspension Components
Struts and shocks wear gradually over time. Moreover, replacement restores ride quality and handling significantly.
Professional installation costs $600-1,200 for front struts. Consequently, DIY completion saves substantial money despite moderate difficulty.
Use spring compressors safely to prevent dangerous accidents. Additionally, compressed springs store tremendous dangerous energy.
Replace strut mounts and bearings while components are disassembled. Furthermore, this prevents needing to repeat the job soon.
Alignment becomes necessary after strut replacement always. Therefore, budget for professional alignment after DIY installation.
7. Fix Minor Exhaust System Leaks
Exhaust leaks create noise and reduce fuel efficiency. Nevertheless, small leaks often repair easily without full replacement.
Shops charge $150-400 for minor exhaust repairs. Consequently, DIY fixes using quality products save significantly.
Clean the leak area thoroughly with wire brushes. Subsequently, exhaust tape or putty won’t bond to dirty surfaces.
Wrap exhaust tape tightly around leak areas. Additionally, some products require heat activation after application.
High-temperature epoxy works for small holes and cracks. Therefore, you can extend exhaust system life considerably.
8. Replace Oxygen Sensors
Failed oxygen sensors trigger check engine lights frequently. Moreover, they reduce fuel economy by 15-40% when faulty.
Shops charge $200-400 for oxygen sensor replacement. However, the sensors themselves cost only $50-150 typically.
Spray penetrating oil on sensor threads before removal. Subsequently, heat helps break corrosion on stubborn sensors.
Use an oxygen sensor socket for proper removal clearance. Additionally, these specialized sockets prevent wire damage.
Apply anti-seize compound to new sensor threads. Therefore, future removal becomes significantly easier when needed.
9. Repair Minor Electrical Issues
Electrical problems often seem mysterious and intimidating. Nevertheless, many issues trace to simple corroded connections.
Shops charge diagnostic fees plus hourly rates for electrical work. Consequently, simple fixes become unnecessarily expensive quickly.
Clean battery terminals with baking soda solution first. Subsequently, many electrical issues disappear after proper cleaning.
Check fuse boxes for blown fuses causing specific problems. Additionally, replace blown fuses with identical amperage ratings only.
Test switches and relays using basic multimeters. Therefore, you’ll identify failed components without expensive diagnostics.
| Common Electrical Issue | Typical Shop Cost | DIY Solution Cost | Time Required |
|---|---|---|---|
| Battery Terminal Cleaning | $50-100 | $5 | 15 minutes |
| Fuse Replacement | $75-150 | $2-5 | 10 minutes |
| Alternator Replacement | $400-800 | $150-300 | 2 hours |
| Starter Replacement | $350-700 | $100-200 | 2 hours |
10. Replace Thermostat and Hoses
Failed thermostats cause overheating or poor heating performance. Moreover, replacement prevents expensive engine damage from overheating.
Shops charge $200-400 for thermostat replacement labor. However, the part itself costs only $15-50 typically.
Drain coolant before removing any hoses or components. Subsequently, you’ll prevent messy spills and coolant waste.
Remove old thermostat and clean the housing surface thoroughly. Additionally, old gasket material prevents proper sealing.
Install the new thermostat in correct orientation. Therefore, the temperature-sensing element faces toward the engine.
11. Fix Power Window Motors and Regulators
Power window failures happen frequently in aging vehicles. Nevertheless, replacement costs less than half professional rates.
Shops charge $300-600 for window motor replacement. Consequently, DIY repair saves hundreds on common problems.
Remove door panels carefully to avoid breaking clips. Subsequently, you’ll access the window motor and regulator assembly.
Disconnect electrical connectors and remove mounting bolts. Additionally, support the glass while removing the regulator.
Install the new motor or regulator and test operation. Furthermore, ensure smooth movement before reassembling door panels.
12. Replace Headlight and Taillight Assemblies
Cracked or foggy light assemblies reduce visibility and appearance. Moreover, replacement improves safety and vehicle value significantly.
Shops charge $200-500 including installation labor. However, assemblies often install with just screws or clips.
Access assemblies from under the hood or trunk typically. Subsequently, disconnect electrical connectors before removing assemblies.
Install new assemblies and verify proper alignment. Additionally, adjust beam patterns if your vehicle allows it.
Test all lights before finalizing the installation. Therefore, you’ll catch wiring problems before reassembly.
13. Perform Wheel Bearing Replacement
Failing wheel bearings create grinding noises and affect handling. Nevertheless, replacement prevents catastrophic wheel separation events.
Shops charge $300-600 per wheel for bearing replacement. Consequently, DIY completion saves significant money despite moderate difficulty.
Jack up the vehicle and remove the wheel safely. Subsequently, remove the brake caliper and rotor carefully.
Remove the hub assembly or press out bearings. Additionally, some designs require specialized pressing tools.
Install new bearings with proper torque specifications. Therefore, you’ll ensure safe operation and long bearing life.
Conclusion
DIY repairs build skills while saving thousands annually. Moreover, you’ll gain confidence tackling increasingly complex projects.
Start with simple repairs and progress gradually. Consequently, you’ll develop skills without overwhelming yourself initially.
Invest in quality tools that last for decades. Additionally, proper tools make repairs safer and more successful.
Watch multiple video tutorials before attempting new repairs. Therefore, you’ll understand variations and potential problems beforehand.
Remember that some repairs require professional expertise and equipment. Furthermore, know your limits and seek help when necessary.