Your kitchen can transform dramatically in just one weekend. Moreover, you don’t need to gut everything or spend thousands. Consequently, strategic updates deliver maximum impact without major construction headaches.
1. Planning Your 48-Hour Timeline
Success requires detailed planning before you touch a paintbrush. Therefore, breaking down tasks by hour prevents wasted time and confusion.
Friday evening should focus entirely on prep work and shopping. Additionally, clearing out your kitchen and protecting floors saves morning hours. Furthermore, having all materials ready prevents mid-project store runs.
Saturday morning starts with painting walls and cabinets simultaneously. Meanwhile, one person tackles walls while another preps cabinet surfaces. Subsequently, this parallel workflow cuts your timeline significantly.
Saturday afternoon and evening focus on second coats and hardware installation. Then, allow proper drying time between each application. Moreover, rushing this stage guarantees disappointing results.
Sunday morning involves final touches, backsplash installation, and styling. Additionally, this gives paint maximum curing time before use. Therefore, plan your meals accordingly for the entire weekend.
| Timeline | Task | Priority Level |
|---|---|---|
| Friday 6-10pm | Shopping, clearing, prep | Critical |
| Saturday 7am-12pm | First coats, major changes | Critical |
| Saturday 1-6pm | Second coats, details | High |
| Saturday 7-10pm | Hardware, fixtures | High |
| Sunday 8am-2pm | Backsplash, final touches | Medium |
| Sunday 3-5pm | Cleaning, styling | Low |
2. Cabinet Transformation Without Replacement
Cabinet painting delivers the biggest visual impact for your investment. However, proper technique separates amateur from professional results.
Remove all cabinet doors, drawers, and hardware before starting anything. Then, label everything with painter’s tape for easy reassembly. Meanwhile, this prevents confusion and mismatched doors later.
Clean every surface with TSP or degreasing cleaner thoroughly. Otherwise, cooking oil residue prevents paint from adhering properly. Subsequently, grease causes peeling and chipping within months.
Light sanding creates the tooth that paint needs to grip. Moreover, it removes glossy finishes that repel primer and paint. Therefore, sand until surfaces feel uniformly dull and smooth.
Prime everything with a high-quality bonding primer designed for cabinets. In fact, this step determines longevity more than paint selection. Furthermore, tinted primer reduces the number of topcoats needed.
Apply paint with foam rollers for smooth, brush-mark-free finishes. Additionally, use angled brushes for detailed areas and edges. Nevertheless, thin coats always beat thick applications for durability.
3. Hardware Updates That Modernize Instantly
Swapping cabinet hardware instantly updates your kitchen’s entire aesthetic. Consequently, this simple change delivers disproportionate visual impact.
Measure existing hole spacing before ordering any new hardware online. Otherwise, you’ll need to drill new holes and fill old ones. Therefore, take accurate measurements with a ruler or tape measure.
Matte black hardware creates modern drama against white or light cabinets. Meanwhile, brushed gold adds warmth and sophistication to any color. Furthermore, mixed metals work beautifully when done intentionally.
Cup pulls on drawers provide easier grip than standard knobs. Additionally, they suit traditional and modern kitchens equally well. Moreover, their horizontal lines create visual cohesion throughout.
Consider statement hardware on just upper cabinets for budget savings. Then, use simpler pulls on lower cabinets that see less attention. Subsequently, this strategy stretches your budget without sacrificing style.
4. Backsplash Installation for Beginners
Peel-and-stick tile makes backsplash installation achievable in hours, not days. Moreover, these products now look remarkably realistic and durable.
Clean your wall surface completely before applying any tile. Furthermore, ensure the area is dry and free from grease. Therefore, wipe down with rubbing alcohol for best adhesion.
Start from the center and work outward for balanced patterns. Additionally, use a level frequently to prevent crooked rows. Meanwhile, press firmly on each tile to ensure proper bonding.
Cut tiles with a sharp utility knife and straight edge. Then, score multiple times before snapping cleanly along the line. Moreover, practice on scrap pieces before cutting final tiles.
Traditional tile installation requires more time but offers superior durability. However, it demands thinset mortar, grout, and proper tools. Therefore, save this method for future renovations beyond 48 hours.
| Backsplash Option | Installation Time | Skill Level | Durability |
|---|---|---|---|
| Peel-and-stick tile | 2-4 hours | Beginner | Good |
| Traditional tile | 8-12 hours | Intermediate | Excellent |
| Beadboard panels | 3-5 hours | Beginner | Good |
| Paint with stencil | 2-3 hours | Beginner | Fair |
5. Lighting Upgrades That Change Everything
New lighting fixtures dramatically alter your kitchen’s ambiance and functionality. Therefore, swapping outdated fixtures should be part of every makeover.
Turn off electricity at the breaker box before touching any wiring. Additionally, use a voltage tester to confirm power is off. Furthermore, photograph existing wiring before disconnecting anything.
Under-cabinet LED strips illuminate countertops for better meal prep visibility. Moreover, they install with simple adhesive backing and plug-in power. Subsequently, this upgrade takes less than an hour total.
Replace dated flush-mount ceiling fixtures with modern alternatives. Meanwhile, pendant lights over islands create focal points and task lighting. Therefore, consider your kitchen’s specific lighting needs carefully.
Dimmer switches add ambiance control for different times and occasions. In fact, they’re inexpensive and install in about 15 minutes each. Furthermore, dimmable LEDs provide both bright task and soft mood lighting.
6. Wall Color Selection and Application
The right wall color either complements or clashes with your cabinet choice. Thus, understanding color relationships prevents costly mistakes.
White or light gray walls create bright, airy feelings in any kitchen. Additionally, they reflect light and make spaces feel larger. Moreover, neutral walls let colorful accessories become focal points.
Navy or dark green accent walls add drama without overwhelming small kitchens. However, limit dark colors to one wall for best results. Meanwhile, ensure adequate lighting to prevent cave-like feelings.
Use semi-gloss or satin finish paints for easy cleaning in kitchens. Furthermore, these finishes withstand moisture and grease better than flat paint. Therefore, invest in quality paint designed for high-traffic areas.
Apply painter’s tape carefully along all edges for crisp lines. Then, remove tape while paint is still slightly wet. Moreover, this prevents peeling and creates professional-looking borders.
7. Finishing Touches and Styling
The final details transform your updated kitchen from construction zone to magazine-worthy. Consequently, these touches showcase your hard work beautifully.
Replace outdated switch plates and outlet covers with fresh white versions. Additionally, this tiny detail makes a surprising visual difference. Furthermore, they cost mere dollars but update the entire space.
Add a new kitchen rug in colors that complement your palette. Meanwhile, rugs provide comfort underfoot and tie design elements together. Therefore, choose washable options for practical maintenance.
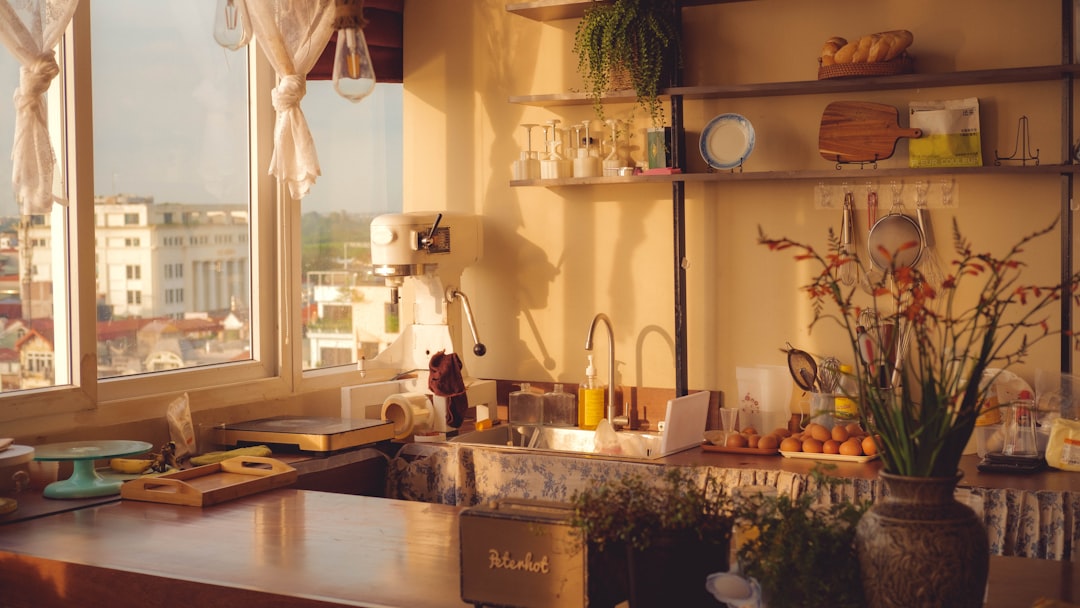
Style open shelving or countertops with cohesive accessories in groups of three. Moreover, varying heights creates visual interest without cluttering. Subsequently, edit ruthlessly to maintain a clean aesthetic.
Install a new faucet if your budget allows this upgrade. In fact, modern faucets dramatically improve functionality and appearance. However, this might push beyond 48 hours for beginners.
Fresh flowers or a fruit bowl adds life and color instantly. Additionally, these elements make your kitchen feel finished and welcoming. Furthermore, they’re easily changeable as seasons or moods shift.
Conclusion
Transforming your kitchen in 48 hours demands planning, focus, and realistic expectations. However, the dramatic results prove that major renovations aren’t always necessary. Strategic updates in cabinets, hardware, backsplash, and lighting deliver maximum impact. Remember that perfection isn’t the goal—noticeable improvement is. Your first weekend makeover builds skills and confidence for future projects. Most importantly, you’ll enjoy your refreshed kitchen every single day. The money saved can fund other home improvements or simply stay saved.